A futuristic notebook for a futuristic student (that's you).
For eons, students have used multiple notebooks, binders, and folders to take notes for their classes, but no longer. By following the steps outlined in this blog in tandem with your Rocketbook notebook and app, you’ll have the ability to:
- Scan your notes into Google Drive right after class
- Erase pages so you’re ready to take notes in the next class
- Carry more items in your now spacious backpack (like snacks)

In other words, you’ll be a successful student with just one notebook. Imagine how impressed your classmates will be when they realize you’re only using a single notebook for every class. The answer is very, they will be very impressed.
1 — Choose How You’ll Use Your Notebook
First, decide how you want to organize your prized possession — your Rocketbook notebook — for all of your classes. Ask yourself:
Q: Will I use this notebook for every class?
If yes, keep things organized by adding notebook tabs to divide your notebook into separate sections for each class’s notes.
Q: Do I need a spray bottle and cloth?
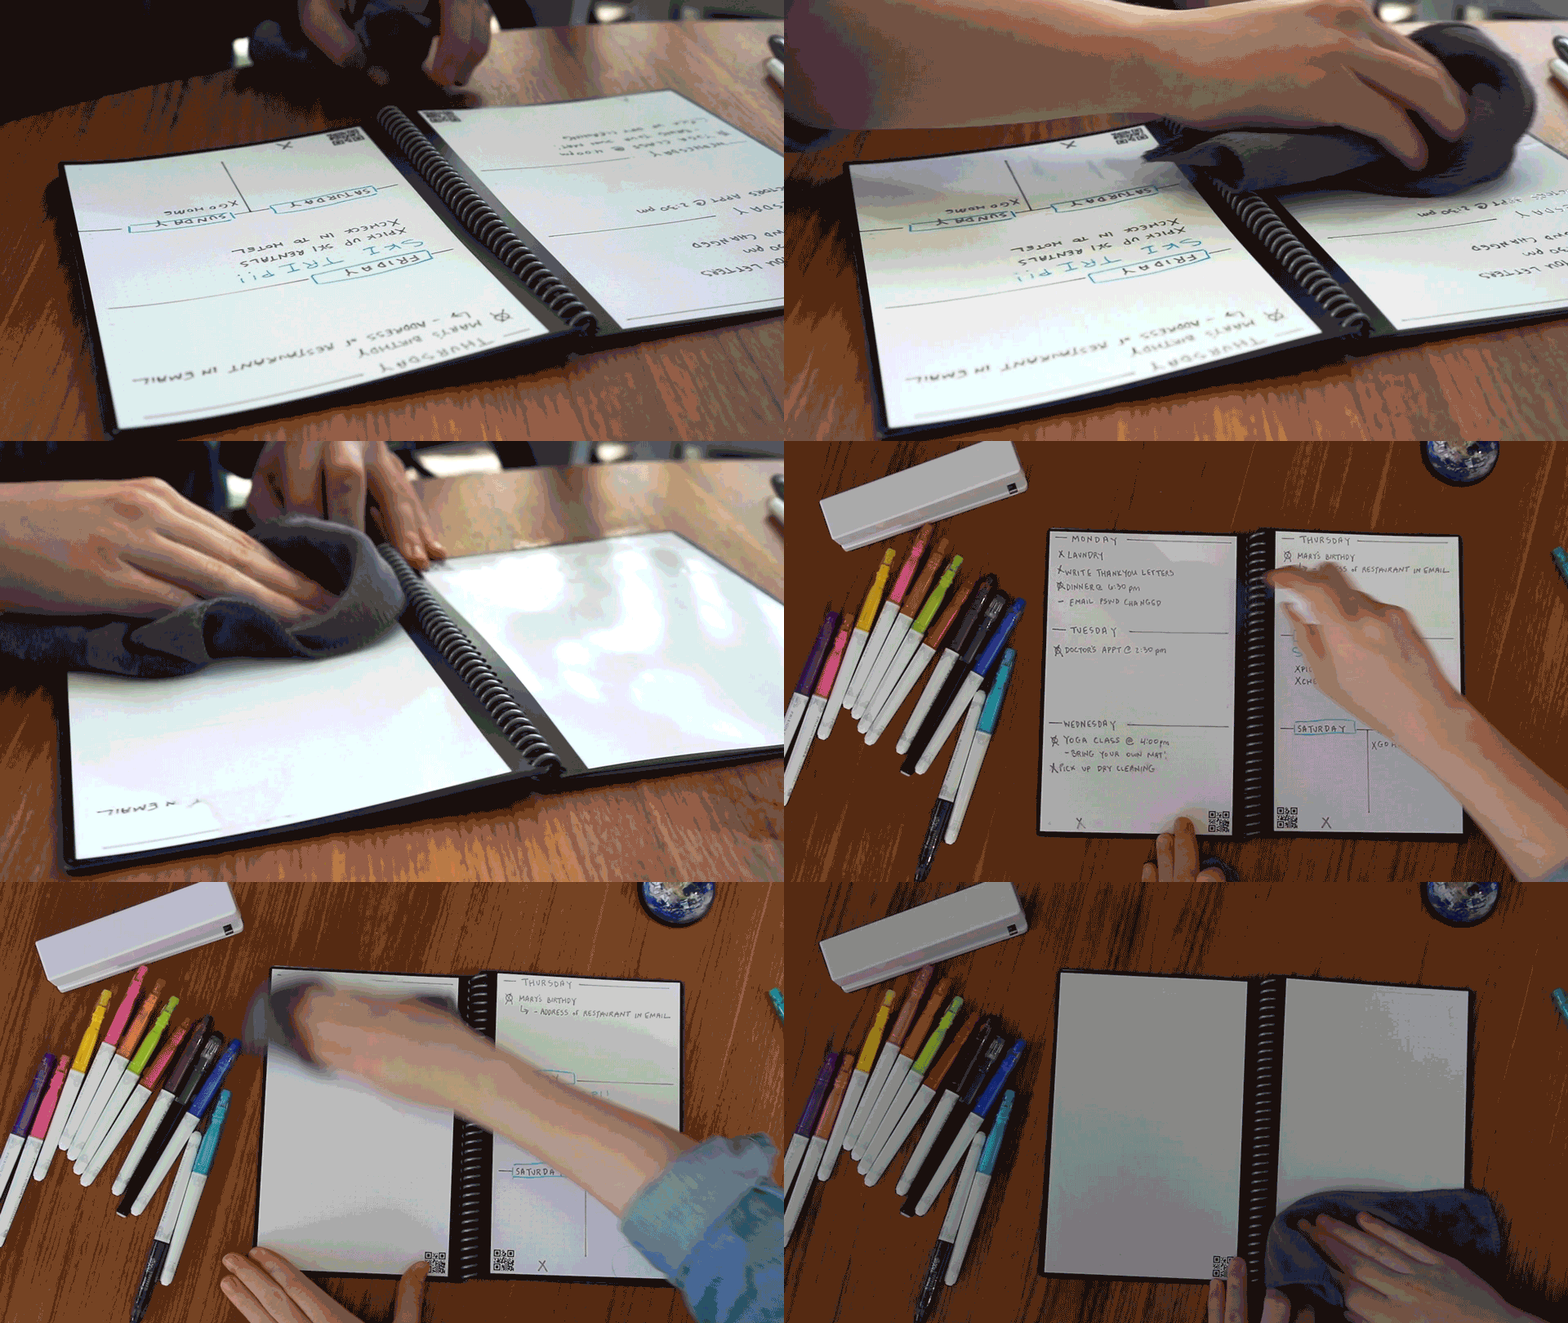
If you’ve got multiple classes in one day, the answer is probably yes. After every class, scan your notes into Google Drive [see section 2 below] and erase your notebook so it’s like a fresh, brand new one subject notebook all over again. It’ll even have that classic new notebook smell.

Pro Tip: For added consistency, color code each classes’ notes to match the color of that section’s notebook tab.
2 — Create Digital Folders For Each Class
Next, use the Rocketbook app to create folders in Google Drive (or another preferred cloud destination): once again, one for each class. These folders will store your notes. Following these steps for your first class (for this example the class will be “Rocket Science”):
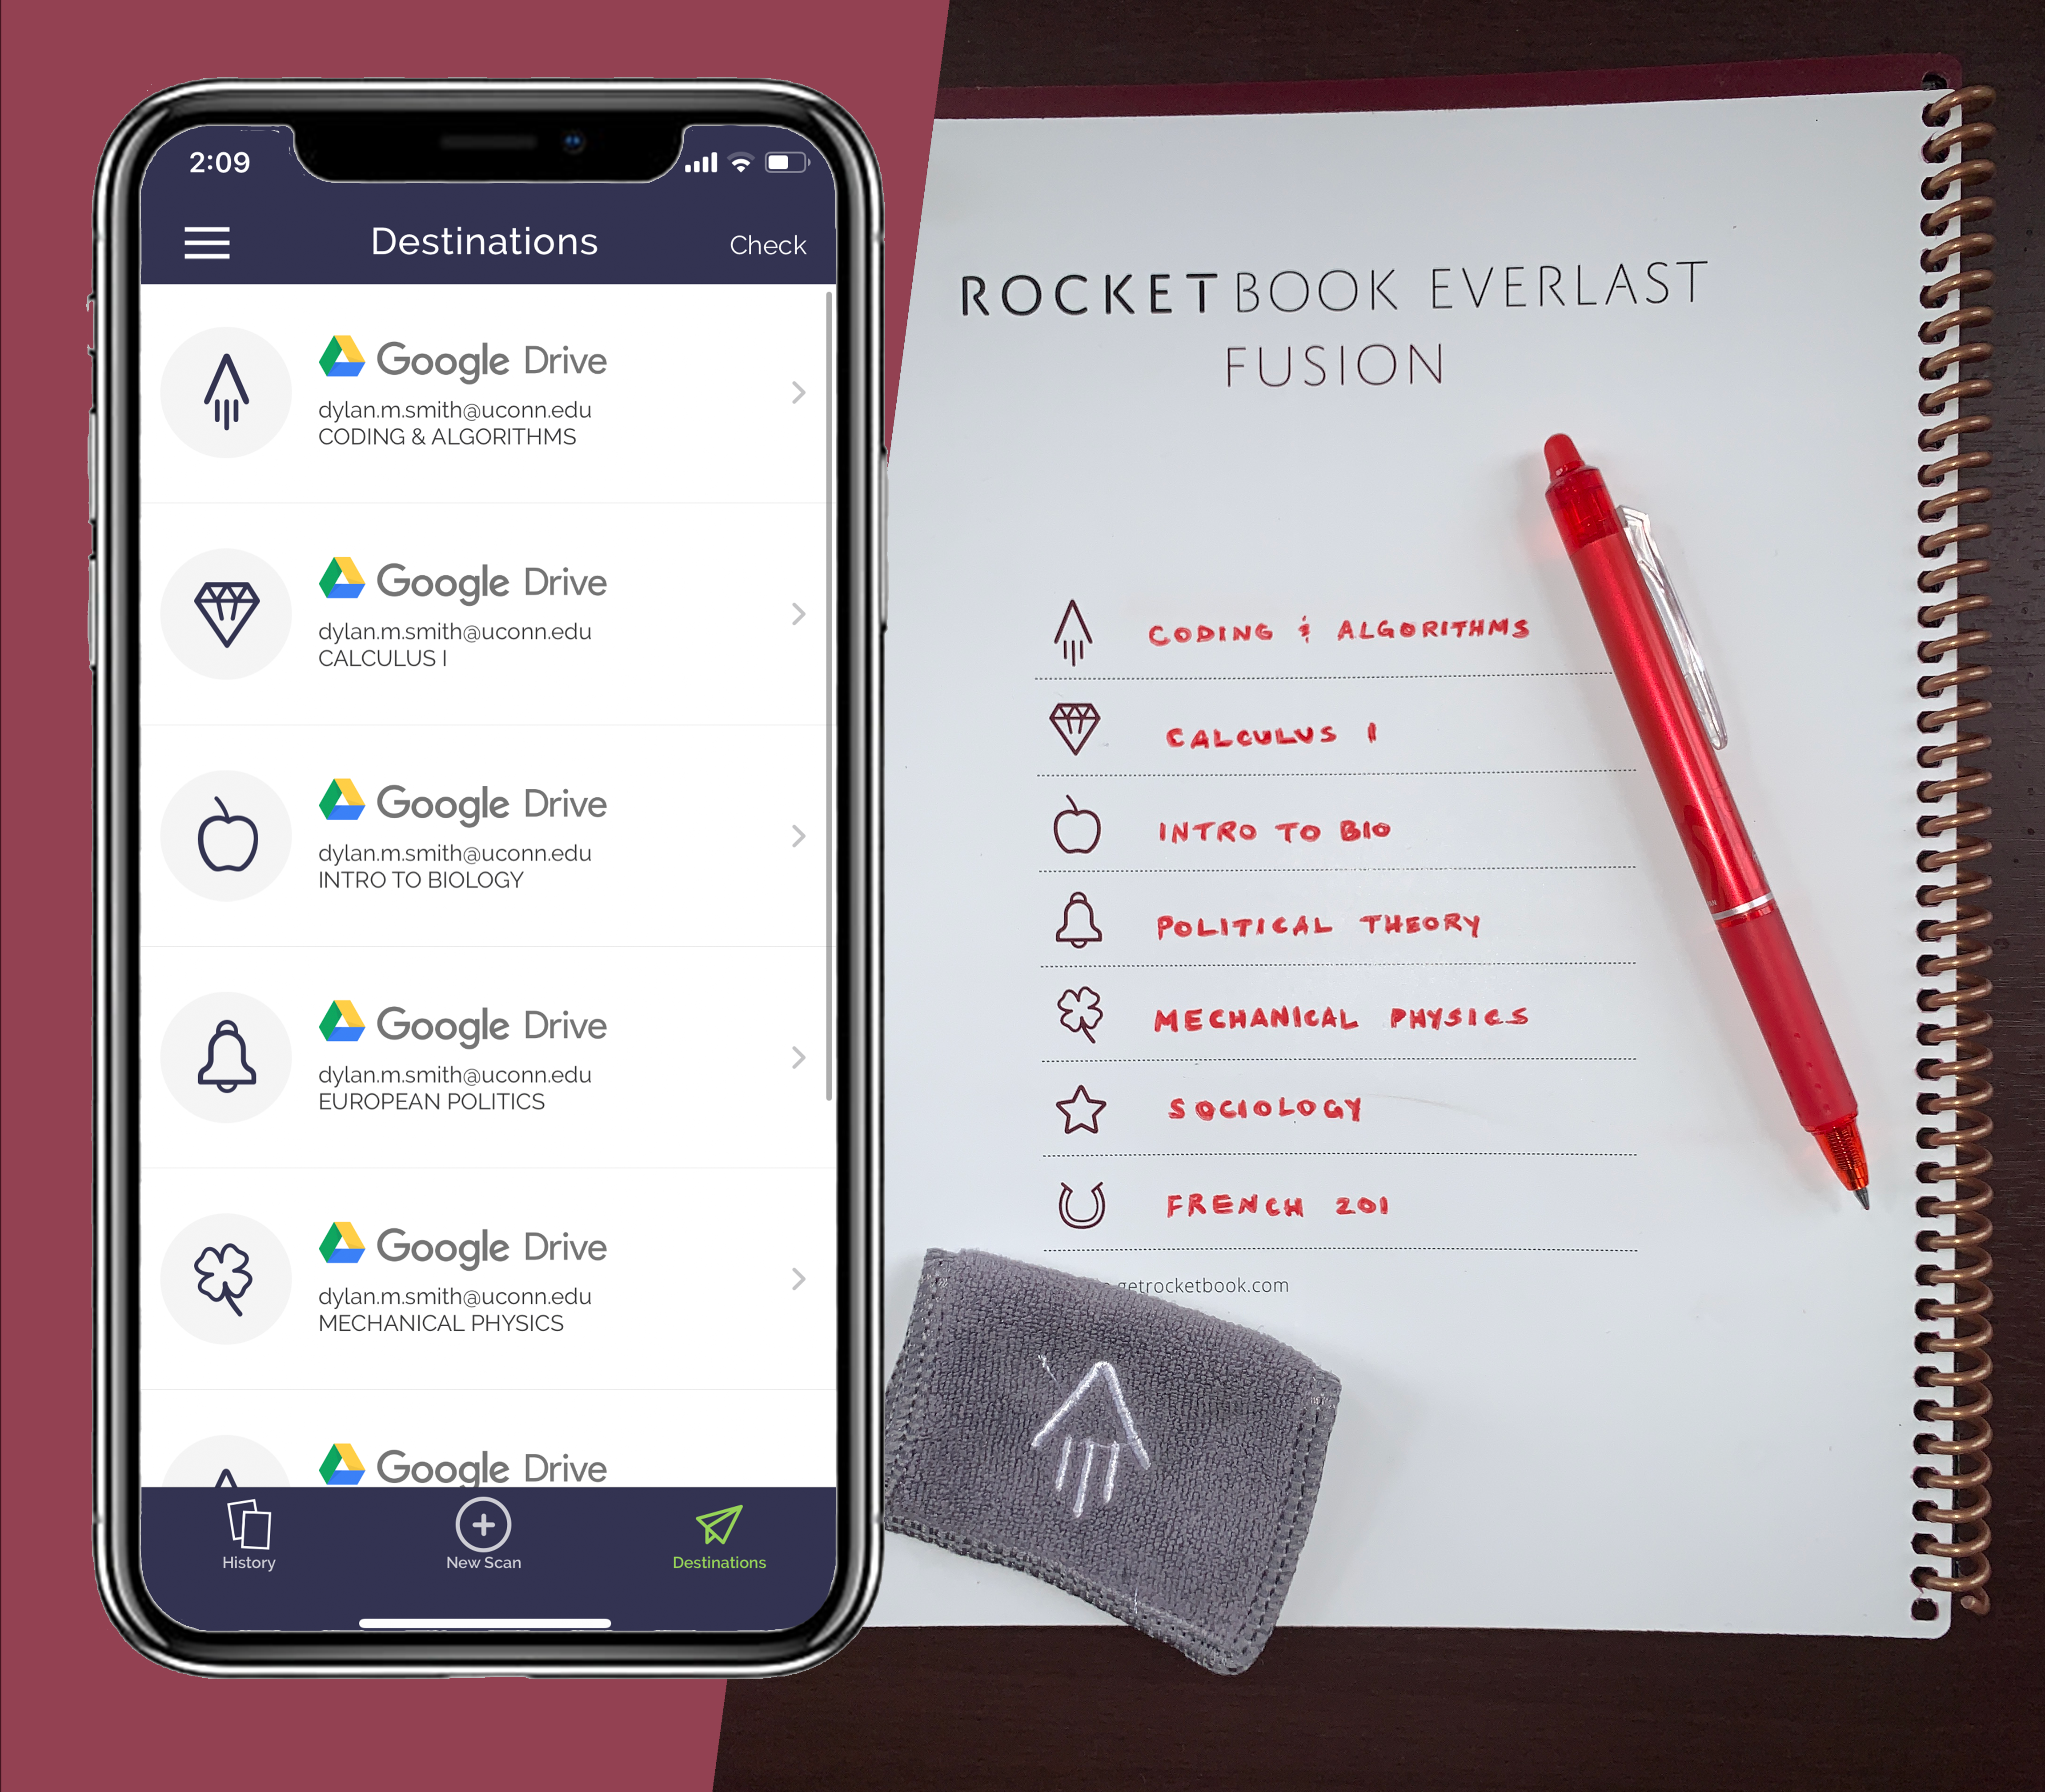
- Open your Rocketbook app and tap over to the “Destinations” tab in the bottom right of your screen.
- Tap the symbol you’d like to use to represent the Google Drive folder for your Rocket Science class (for example, the apple symbol).
- Tap “Change Destination” to bring up all of Rocketbook’s compatible cloud destinations and tap “Google Drive” at the top of your screen.
- Tap the Google Drive account you’d like to use to set up your class folders or tap “Add New Account” to link a new account to the Rocketbook app.
- Once you’ve chosen an account, or signed into a new account, tap “Create New Folder”. This creates a folder that will store your Rocket Science class notes. Type the class/folder name and then tap “Create” in the top right of your screen.
- To save the Rocket Science folder as the destination for the apple symbol, tap “Save” in the top right of your screen.

Pro Tip: Use the inside cover of your Rocketbook notebook to write down which class each destination symbol represents. Note: this page can be erased.
Congrats! You’ve just successfully created a link between analog and digital worlds. More specifically, you’ve created Google Drive folder that will store all your scanned Rocket Science class notes. This is the first leg of your journey towards a truly futuristic scholastic experience.
Repeat these steps to create folders for all of your classes and to be one step closer to using one notebook for all your classes.
3 — Upload Handwritten Notes & Assignments
You’re almost there. If using a single Rocketbook notebook for all your classes was a NASA mission, you’d be on your way back home. All there is left to do is to upload your notes to Google Drive before you erase them, which is visually explained in this video that includes some very exciting music.
Once all your classes’ notes are uploaded to Google Drive in their respective class folders, it’s easy to submit assignments by email, Blackboard, or any other virtual classroom module your school uses.
“Uh oh”, you might be thinking. “What if I have so many notes in one class that I can’t find the right assignment?” or “what if I accidentally erase a page before I scan it?”.
Don’t worry, we’ve thought of all that.
Uh oh. How will I find the notes I’m looking for?
- Introducing Rocketbook smart titles. Use hashtags around your page titles (e.g. ## Page Title##) to employ the computer vision technology of the Rocketbook app. The app will read your handwritten smart title and automatically use that as the name of your scanned file. Choose a naming convention such as Class Name-Date-Topic and stick to it! That way, when it’s time to prepare for an exam, you won’t waste precious minutes searching through Google Drive for the right page of notes. Simply search for the topic and voilà! Your notes are at your fingertips.
Uh oh. How can I stop myself from erasing vital notes?
- After you scan a page, circle the page number as an indicator that the page has been scanned and is ready to be erased. That way, you’ll never wrongly assume a page has been scanned, and you’ll never lose important notes.

Mission Recap
Now you‘re equipped with the knowledge to use a single Rocketbook notebook for all your classes. So the next time any of the class sections in your notebook gets full, b̶u̶y̶ ̶a̶n̶o̶t̶h̶e̶r̶ ̶n̶o̶t̶e̶b̶o̶o̶k̶ use the Rocketbook app to scan, save, erase, and reuse your single notebook all semester long without having to spend any money on additional school supplies. Your back, your wallet, and your report card will thank you (that’s a metaphor, those things can’t actually speak).


